I’m helping others with code, but I’ve only been thanked once after helping with 3 projects, but I want to access custom domains. Can anyone help me, please? Thank you very much in advance.
1 Like
Hey @cedkim,
Welcome to the Glitch forums!
If you still want to use custom domains without having 2 thanks, here’s how to do it:
-
Go to freenom.com and purchase a domain. Domains ending with
.com,.io, and other such domains cost money. For free domains, search for domains ending with.tk,.ml,.ga,.cfand.gq. -
Then in your project, place the following piece of code in your
server.js.
function checkHttps(req, res, next){
  // protocol check, if http, redirect to https

  if(req.get('X-Forwarded-Proto').indexOf("https")!=-1){
    return next()
  } else {
    res.redirect('https://' + req.hostname + req.url);
  }
}

app.all('*', checkHttps);
Make sure to place this code after const express = require('express'); (the declaration of express).
-
Go to fly.io and create an account. After creating your account, log in to your account
-
Then, go to https://fly.io/sites.
-
You will see a button that says
Add new site.

- Then you will reach this page:

-
Make sure to choose
hosting servicean then click on Glitch. A textbox will appear. Type in your Glitch project domain without thehttps://orhttp://part, like this:yourprojectname.glitch.me. -
Then click
Preview your site.
NOTE: You might get an error sometimes about Glitch headers, but if such an error is shown, just click ‘Continue anyway’!
- Then you can click
Set your hostname!
You will be greeted with another prompt.

-
Now type in the hostname your going to use. For example, I’d put in
mywebsite.tk -
Now click
Next, configure DNS. -
It will bring you to a different screen. Ignore what it says and just click the button that says
Got it! -
You will then see a dashboard like this:
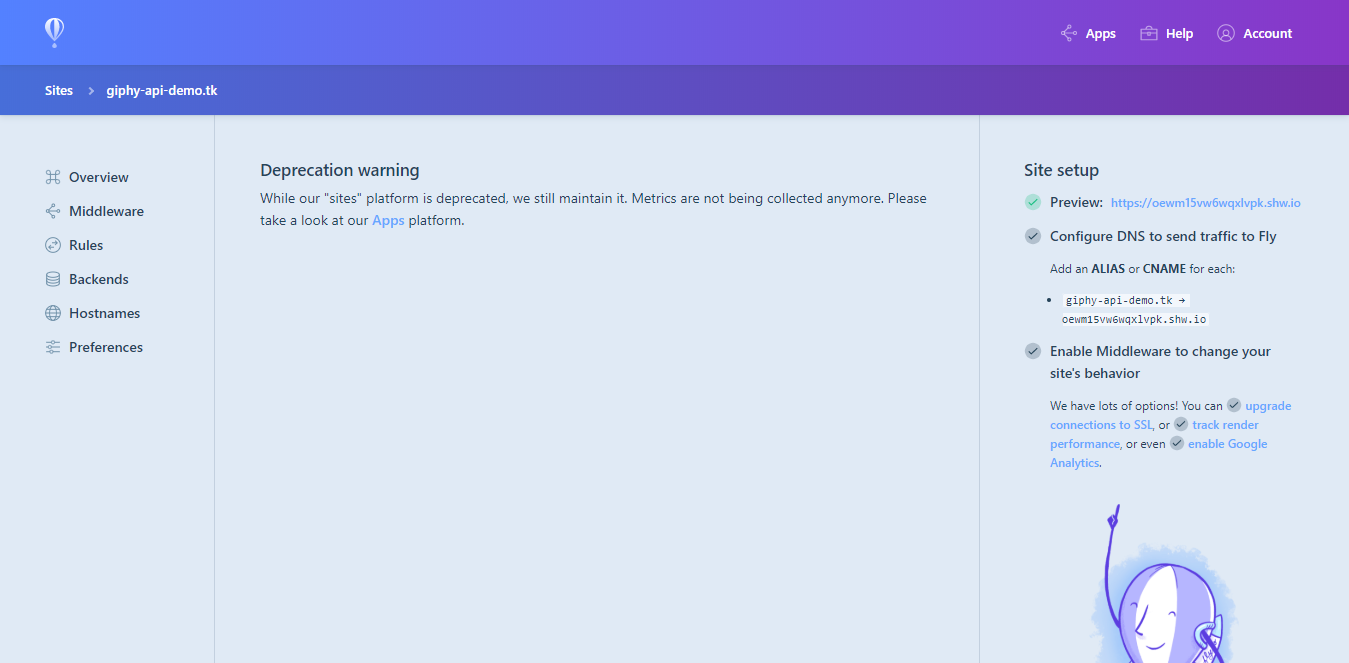
- On the right side of the dashboard, you will see a preview URL. Copy it:
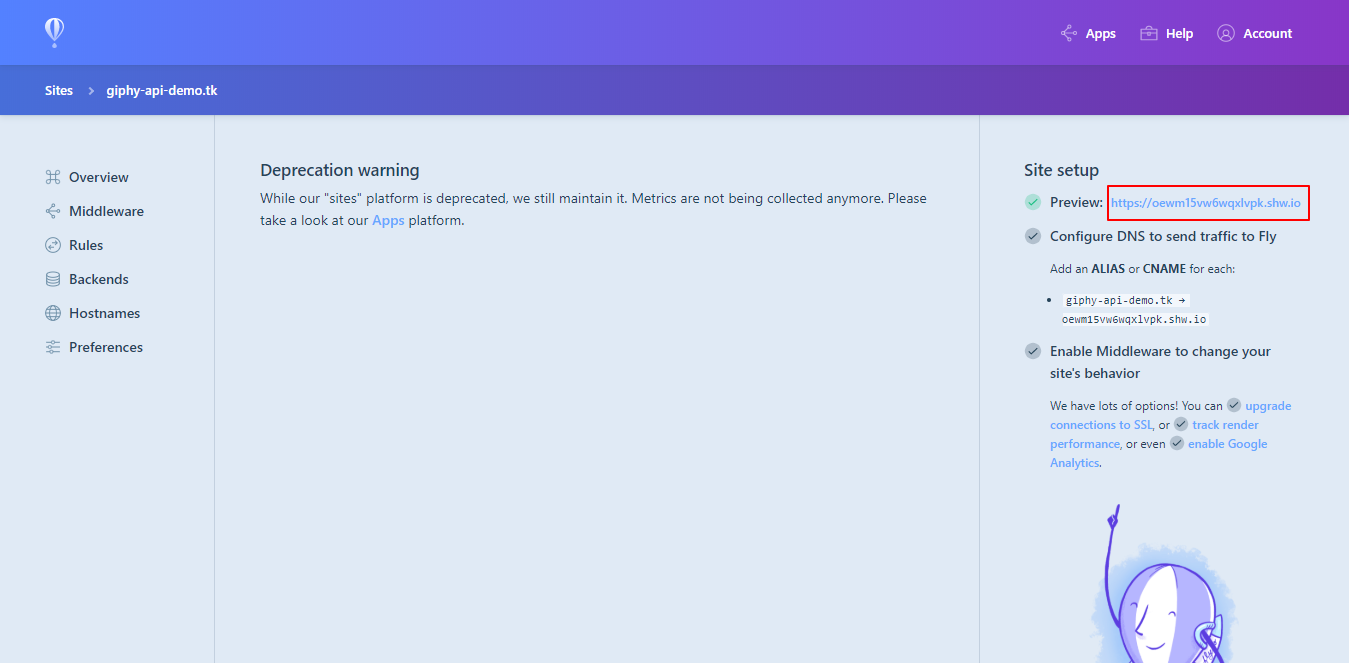
- Then open Command Prompt on Windows or Terminal in Linux and MacOS. Type
FOR WINDOWS:
ping THE_URL_YOU_COPIED
FOR MacOS:
dig THE_URL_YOU_COPIED
NOTE: Make sure to remove the https:// part!
For example:
ping oewm15vw6wqxlvpk.shw.io
Now you will notice an IP will display on the screen.
Example:
(Windows)

(MacOS and Linux)

Now write down the IP on a piece of paper or just type it out into Notepad or something. You’ll need your IP later.
- Go to freenom.com
Go to My Domains
Click on Manage Domain
Click on Management Tools
Click on Nameservers
Select Use default nameservers
Press Change Nameservers
Now you can setup your DNS records, by going to
the Manage Freenom DNS area.
You do this by:
Go to My Domains
Click on Manage Domain
Manage Freenom DNS
-
You will get a box like this:
-
Now, leave the
Namepart alone. Now set theTTLpart to14440. -
In the
Targetbox enter the IP address you wrote down. -
Now save that then your nearly done.
-
Now go back to the fly.io dashboard. Then click
Middleware.


- You will be taken to a page like this:

- You can enable whatever you want but you must click the
Addbutton forHTTPS Upgrader.
That’s it! You should be set to go!
Note: It can take while for your DNS provider’s name servers to update!
Hope that helps!
This post is based on an earlier post by @charliea21 about the same topic. It can be viewed by clicking here. Thanks to @charliea21 for the pictures.
2 Likes
Thanks, but I want to use Glitch’s built-in system.
Hey @cedkim,
I still recommend this method, because I find the in-built feature a bit unpredictable. You should know that Glitch also uses Fly.io for the in-built custom domain feature, and it is better to do it this way.
If you still wish to use the built in feature you still need 2 thanks.
Nevermind! I now have 3 thanks! 